Jelly-o marshmallow candy ice cream. Chocolate cake topping cupcake gingerbread tiramisu gummi bears cake soufflé jelly.
Welcome to the Blog
featured post
view post>
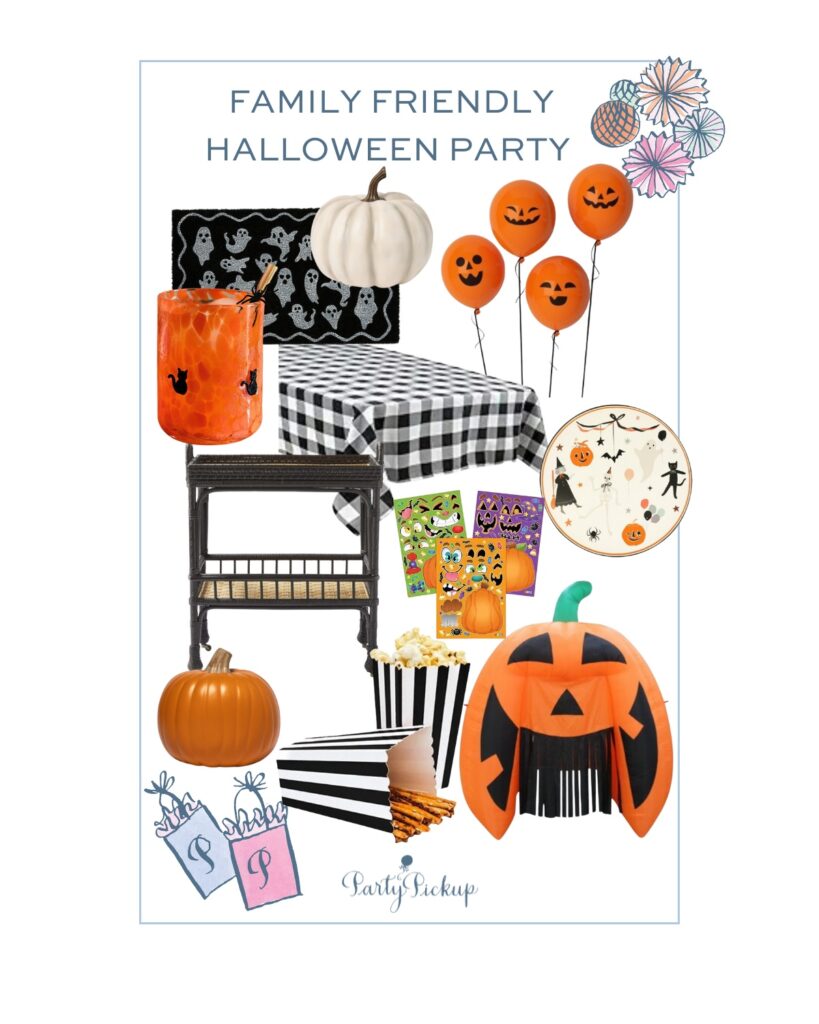
Planning a family-friendly Halloween party can be both fun and stress-free. With a few creative ideas, you can throw a memorable Halloween celebration that both kids and parents will enjoy. Here’s how to host a classic and adorable Halloween party for families with minimal effort.
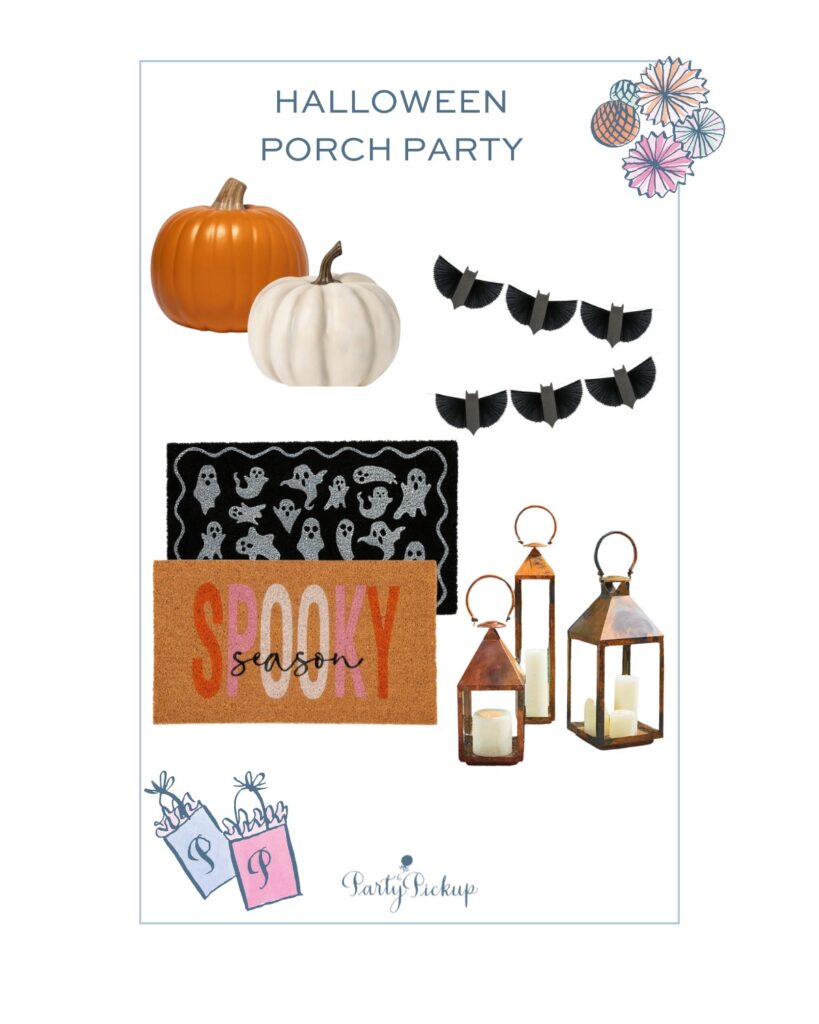
Family Friendly Halloween Porch Decorations
- Halloween Doormat: Welcome guests with a fun and festive Halloween doormat. Choose one with a spooky design or a playful greeting to set the tone right at the entrance.
- Faux Pumpkins: Arrange a variety of faux pumpkins in different sizes and colors on the porch steps or beside the door. These reusable pumpkins add a pop of color and a classic Halloween vibe without the mess of real ones.
- Lanterns: Place lanterns around the porch for a warm, inviting glow. Opt for battery-operated lanterns with a flickering effect to mimic real candlelight, enhancing the spooky ambiance while keeping it safe.
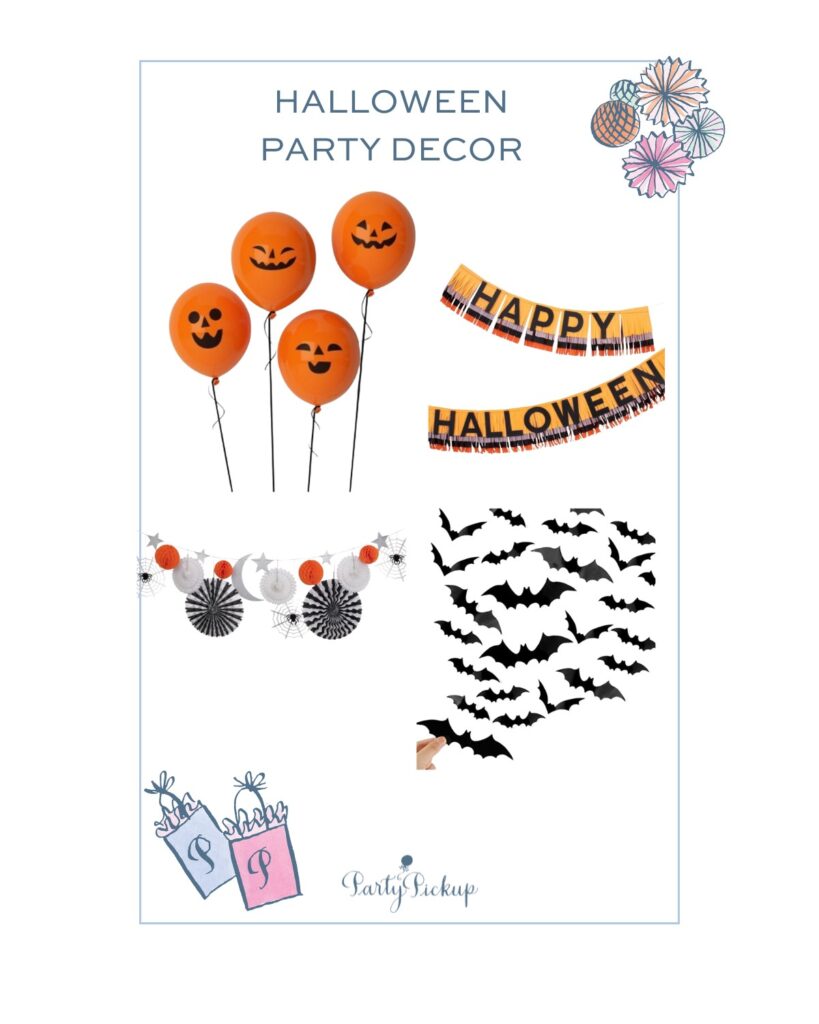
How to Decorate Your Halloween Party with High Impact Ideas
Make your Halloween party festive and fun with decorations that are simple to set up but make a big impact!
- Hang a Halloween Banner: Start by hanging a “Happy Halloween” banner across a doorway or over a mantle. It’s a quick and easy way to instantly set a spooky tone and welcome guests with a festive touch.
- Add Balloons in Halloween Colors: Inflate balloons in Halloween colors like orange, black, and purple. Group them in bunches around the party area or tie them to chairs for a pop of color that’s effortless yet eye-catching. Keep a helium tank on hand at home to make this an easy task!
- Decorate with Paper Bats: Order pre-cut paper bats from Amazon and stick them to walls or windows to add a quick and easy spooky vibe. Arrange them to look like they’re flying across the room, or on a mirror or doorway for a playful and easy decoration idea.
- Create a Cozy Glow with String Lights: Drape Halloween string lights around your doorway or use battery-operated candles to create a warm, inviting glow. These simple lights add just the right amount of ambiance without any hassle.
- Products to Have on Hand:
- “Happy Halloween” Banner
- Halloween Balloons
- Paper Bats
- Halloween String Light
With these easy-to-use decorations, you’ll create a fun and festive atmosphere in no time, making your party memorable with minimal effort.
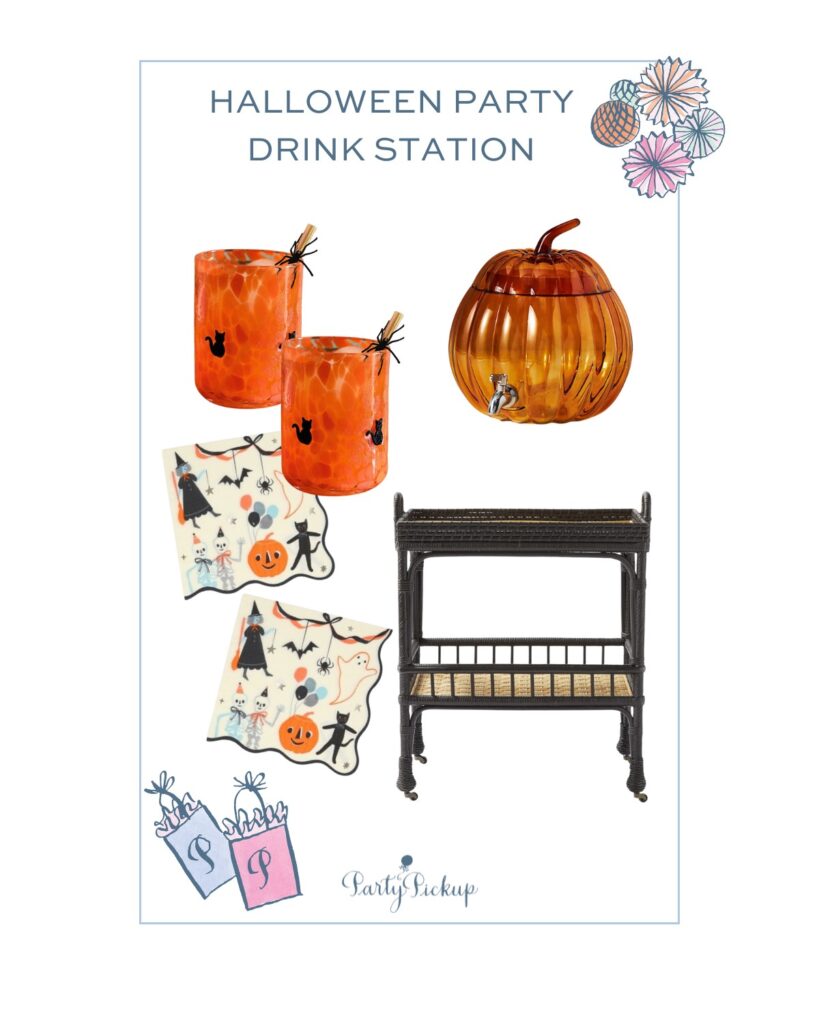
Festive Drink Station for Kids and Adults
Complete your Halloween party with a fun and festive drink station that everyone will enjoy! Here’s how to set it up:
- Set Up a Drink Station: Create a dedicated area for your drinks with a variety of options to please both kids and adults. Include apple cider, hot chocolate, and a “Witch’s Brew” punch made with fruit juice and ginger ale for a bubbly, refreshing twist.
- Use Halloween-Themed Cups: Add a touch of festivity with Halloween-themed cups and straws. They make the drinks more fun and get everyone into the Halloween spirit!
- Add a Beverage Dispenser for Punch: Use a beverage dispenser to serve your “Witch’s Brew” punch. It’s a stylish way to offer a big batch of punch and makes refilling easy for your guests.
- Provide Hot Chocolate Mix: Keep it simple with hot chocolate mix for those who prefer a warm, cozy drink. Just add hot water, provide disposable insulated cups with a lid, and you’ve got a comforting treat ready to go!
Products to Have on Hand:
With these easy steps, your drink station will add a festive and fun touch to your Halloween party, ensuring everyone has something delightful to sip on!
Serve Easy and Fun Halloween Party Snacks for Families
Hosting a family-friendly Halloween party doesn’t have to be complicated! Keep the menu simple yet festive with these easy-to-make treats that are sure to be a hit with both kids and adults.
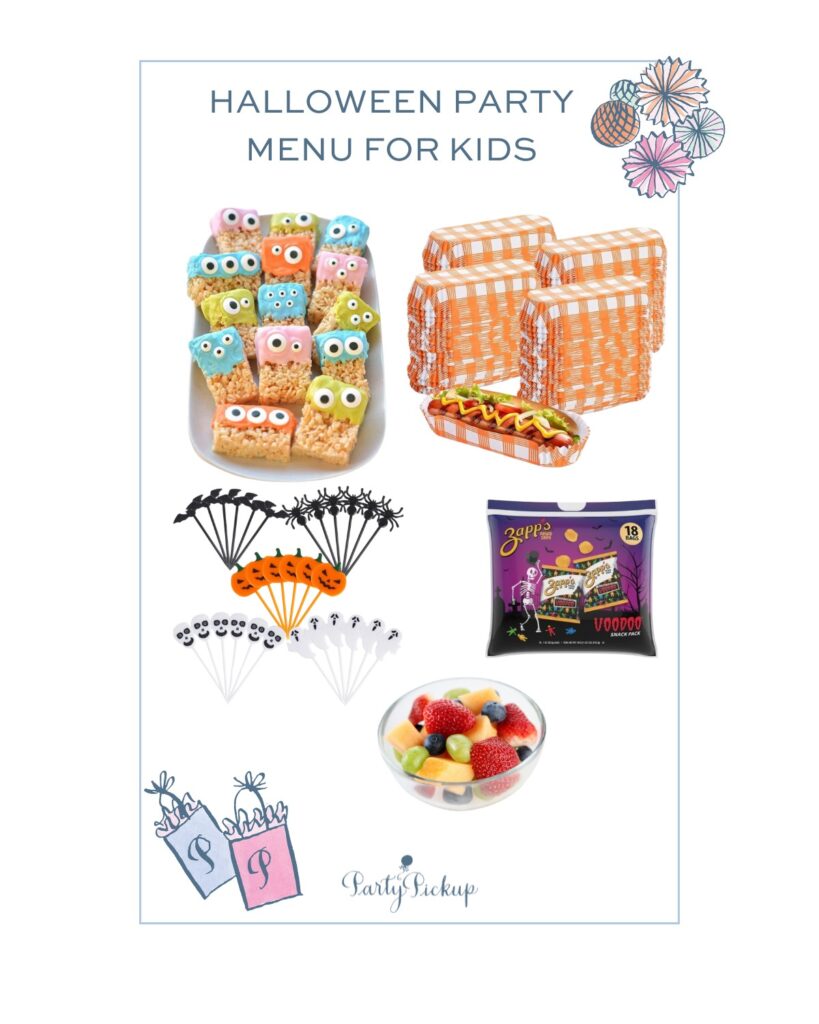
Kid Friendly Halloween Menu
- Hot Dogs: Serve up some “Halloween Hot Dogs” by grilling them ahead of time, placing them in buns, and wrapping each in a hot dog wrapper. They’ll be ready to grab and enjoy, making it easy for guests to fuel up without the need to grill on demand—perfect for a hassle-free haunted gathering! I’ve also linked some warming hot dog wraps here.
- Monster Rice Krispie Treats: These treats are a monster hit! Make classic Rice Krispie treats, but with a twist—add a few drops of green food coloring to the marshmallow mix for a fun, ghoulish color. Before the mix sets, press in some candy eyes to give them a spooky, silly look. Cut them into squares, and you’ve got a batch of cute and festive snacks ready to go. (These can be made a day or two ahead of time and placed in a sealed container.) You can also use the premade krispy treats for a quick shortcut.
- Pre-Packaged Halloween Snacks: Keep it super easy with pre-packaged Halloween-themed snacks. Mini bags of chips, pretzels, and spooky-shaped crackers are perfect for grabbing and munching. They’re a no-mess, no-fuss option that adds variety to your snack table and keeps cleanup easy for busy moms.
These snacks are not only festive but also super easy to make, letting you spend more time enjoying the party with your guests!
Products to Have on Hand:
- Hot Dog Paper Trays
- Candy Eyes and other items for Rice Krispy Treats
- Pre-Packaged Halloween Snacks
These simple ideas are perfect for creating a fun Halloween vibe without spending hours in the kitchen. Get the kids involved, and enjoy a memorable and stress-free celebration!
Simple Halloween Party Menu for the Grown-Ups
Let’s keep it easy and fun with a few delicious options that everyone will love. No need to stress over the food—just keep it simple and tasty!
- Chips and Salsa Trio: Set out a big bowl of tortilla chips with three salsas—mild, spicy, and creamy queso. This gives a pop of color and flavor variety without any fuss!
- Pulled Pork Sliders: Grab some pulled pork from your favorite local spot and serve it on Hawaiian rolls with a side of BBQ sauce. These sliders are quick to put together and perfect for a party.
- Cheese and Crackers: Arrange a selection of cheeses (like cheddar, brie, and gouda) with an assortment of crackers. Toss in some grapes for a little sweetness and color. It’s a simple yet classy snack that pairs perfectly with any Halloween festivities!
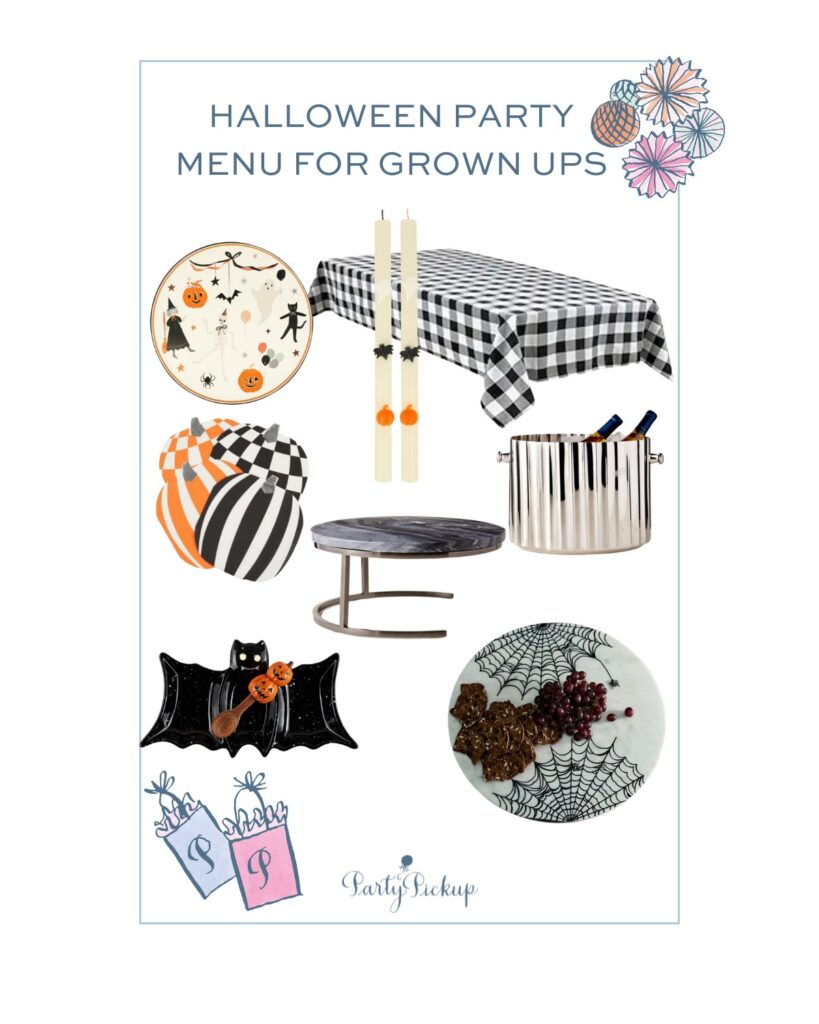
These three easy options will keep your guests happy and make hosting a breeze! I’ve linked some fun serving items here!
Organize a Costume Contest for Kids
Hosting a costume contest for kids at your family friendly Halloween party is a simple and fun way to keep everyone entertained! Here’s how to set it up with minimal effort:
- Create a Costume Parade: Let the kids show off their costumes with a quick parade around the party area. It’s a fun way for everyone to see each other’s outfits and get into the Halloween spirit! Create a “Stage” are to award costumes. This can be your front porch or in front of a simple Halloween banner.
- Pick Fun Categories: Keep it simple with a few categories like “Most Creative,” “Funniest,” and “Spookiest.” You can even have a “Best Group Costume” for siblings or friends who want to coordinate. This makes judging easy and keeps the focus on having fun!
- Award Small Prizes: Hand out little prizes like Halloween-themed stickers, mini toys, or candy for each category winner. The prizes don’t have to be fancy—just a small token to celebrate each kid’s effort and creativity!
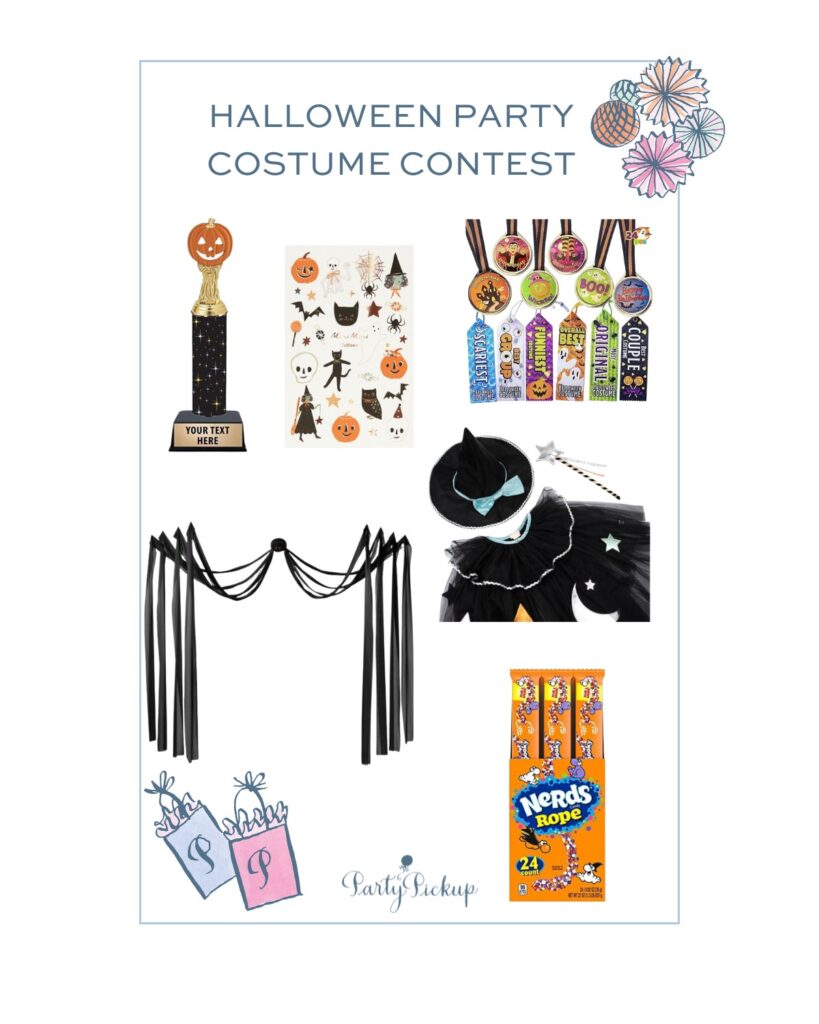
With these easy steps, your costume contest will be a hit, keeping the kids engaged and excited without any complicated planning. Here are some adorable items to use for your costume contest!
Set Up an Adorable Candy Station for Your Halloween Party
A candy station is a fun and adorable addition to any Halloween party, perfect for kids and adults alike! Here’s how to set up a super cute candy station that will wow your guests and add a playful touch to your party:
Set up your candy station, and get ready for a sugar-filled, giggly good time at your family friendly Halloween party!
- Choose Your Candy Display: Use clear acrylic jars to show off a variety of colorful candies, like chocolates, gummies, and candy corn. The clear jars make the candy look extra tempting and add a bit of sparkle to your setup!
- Add Fun Accessories: Provide small scoops and cute paper treat bags, so everyone can create their own custom candy mix to take home. It’s a sweet party favor that doubles as a fun activity for guests of all ages!
- Decorate Your Station: Lay down a Halloween-themed tablecloth for a festive base. Scatter some plastic spider rings around the jars for a little extra spookiness. This easy decoration idea will make your candy station stand out and add to the Halloween fun!
Candy Station Must-Haves:
- Clear Candy Jars
- Variety of Candy
- Paper Treat Bags
- Halloween Tablecloth
- Plastic Spiders
With these simple steps, your candy station will be a hit and bring smiles to everyone’s faces!

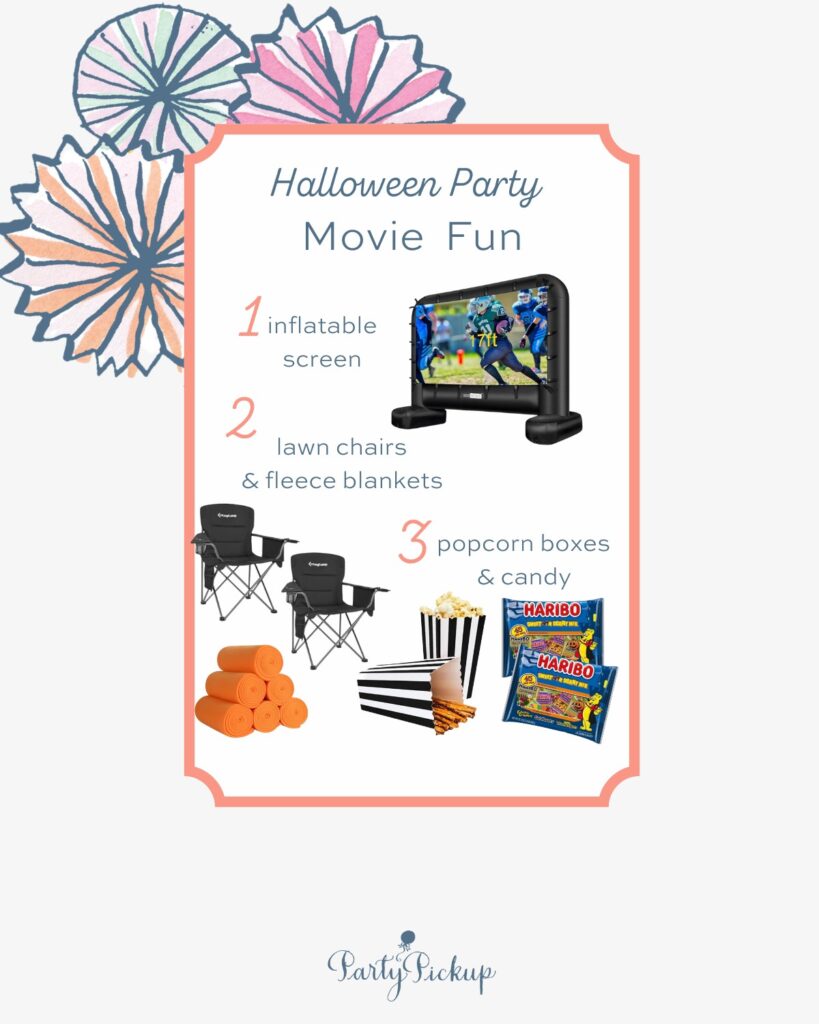
Set Up a Cozy Halloween Movie Corner
Create a super cozy spot for families to unwind and enjoy some Halloween classics! Here’s how to set up an adorable movie corner at your Halloween party that everyone will love:
- Lay Out Comfy Blankets and Pillows: Start by spreading out lawn chairs with throw blankets and plenty of fluffy pillows to make a comfy seating area. This will be the perfect place for everyone to snuggle up and relax during movie time.
- Set Up the Movie Screen: Use an inflatable movie screen to create a mini theater right in your backyard or living room. It’s easy to set up and makes movie watching feel extra special and fun!
- Provide Fun Snacks: Fill Halloween-themed popcorn containers with fresh popcorn and place bowls of candy around for easy snacking. This keeps the treats within reach and adds a festive touch to the cozy setup.
- Pick Classic Halloween Movies: Choose family-friendly favorites like “Hocus Pocus” and “It’s the Great Pumpkin, Charlie Brown.” These movies are sure to bring some nostalgic fun and keep everyone entertained.
Products to Have on Hand:
- Inflatable Movie Screen
- Popcorn Containers
- Halloween Throw Blankets
With these simple steps, you’ll create a cozy Halloween movie corner that’s perfect for relaxing, snacking, and enjoying some classic Halloween fun with the whole family!
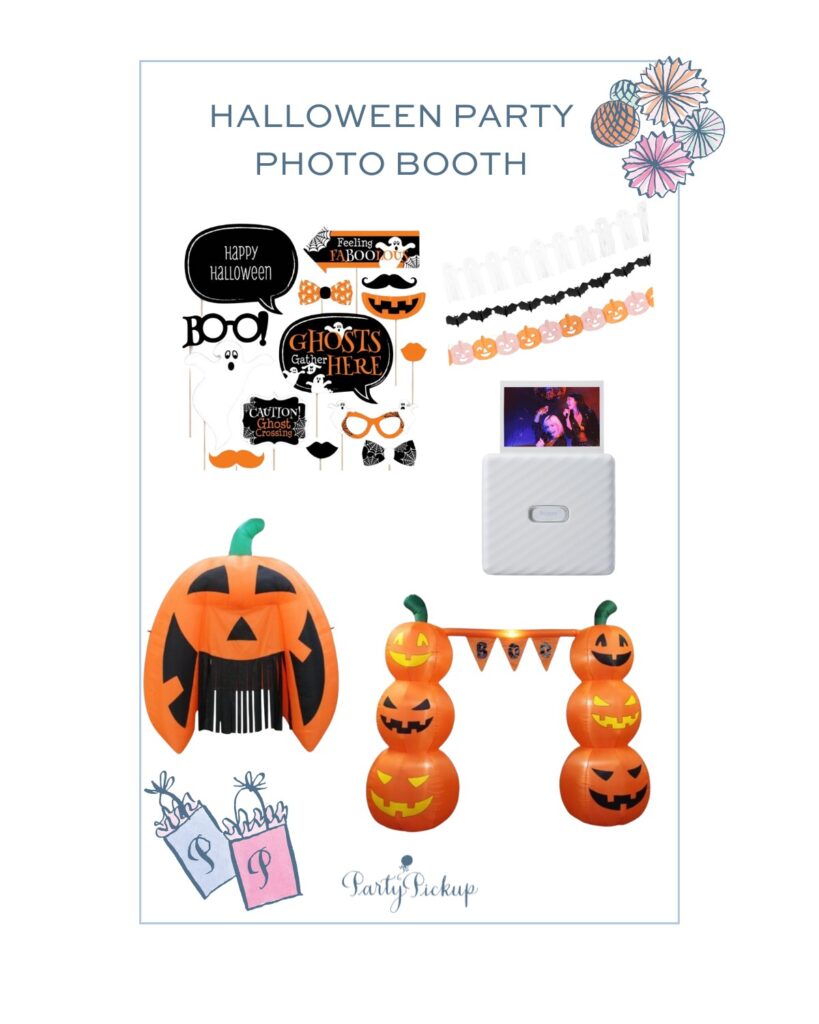
How to Add a Photo Booth for Fun Family Memories
Make your Halloween party extra memorable with a fun and adorable photo booth! Here’s how to set it up:
- Create a Festive Backdrop: Set up a simple backdrop with Halloween designs like pumpkins, ghosts, or bats. This makes for a cute and colorful background for all the silly photos!
- Provide Fun Props: Fill a table with Halloween-themed props such as witch hats, funny glasses, and spooky masks. These props will encourage guests to get creative and add a playful touch to their photos.
- Use an Instant Photo Printer: For instant keepsakes, use a polaroid camera or an instant photo printer. Guests can snap a photo and take home a fun memory from the party!
Products to Have on Hand:
- Halloween Photo Booth Props
- Halloween Backdrop
- Instant Photo Printer
With these easy steps, your photo booth will be a hit, giving everyone a chance to capture cute and silly moments that they’ll cherish long after the party is over!
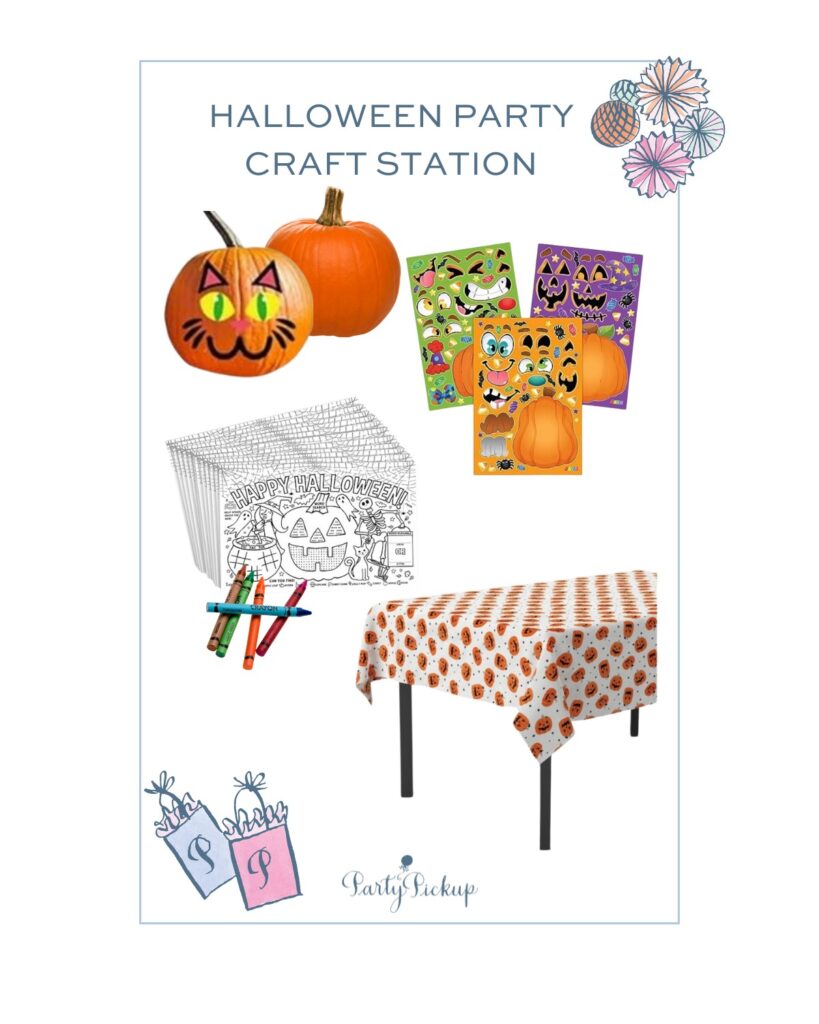
Plan a Simple Halloween Craft Station
For a creative touch, set up a simple craft station for kids at your family-friendly Halloween party. Provide easy-to-make crafts like Halloween-themed coloring pages, sticker sets, or decorating paper masks. These crafts are mess-free, require minimal supplies, and keep kids entertained. It’s a great way to add a creative element to your party without much effort.
Products to Have on Hand:
- Halloween Coloring Tablecloth
- Halloween Sticker Sets
- Pumpkin Decorating Stickers for mini pumpkins
Throwing a family-friendly Halloween party can be simple and fun with the right planning. Focus on easy decorations, festive snacks, and engaging activities to create a memorable celebration. With a candy station, costume contest, and cozy movie corner, your Halloween party for families will be a hit with both kids and adults. Get ready to host a spook-tacular event that everyone will love! I have also linked more classic Halloween party items here. Happy Halloween?

featured post
view post>

When it comes to hosting, the smallest details often create the most stress. You are texting friends, asking if anyone has extra chairs, candles, or serving pieces. I have been there more times than I can count. Over time, I started pulling together a collection of party prep essentials that make hosting feel easier and more enjoyable. This is not about having everything perfectly curated. Instead, it is about creating a thoughtful foundation you can build on for any gathering. I am still adding to my own collection, but a few key pieces have already made a noticeable difference.
Foundational Party Furniture and Setup Pieces
First, focus on the items that create structure for your party. These are the pieces you will use repeatedly, no matter the occasion. Having them ready allows you to host without last-minute scrambling and makes your space feel prepared and welcoming.
I finally invested in bamboo chairs, and they were worth every penny. They instantly elevate any gathering while still feeling versatile and easy to use.
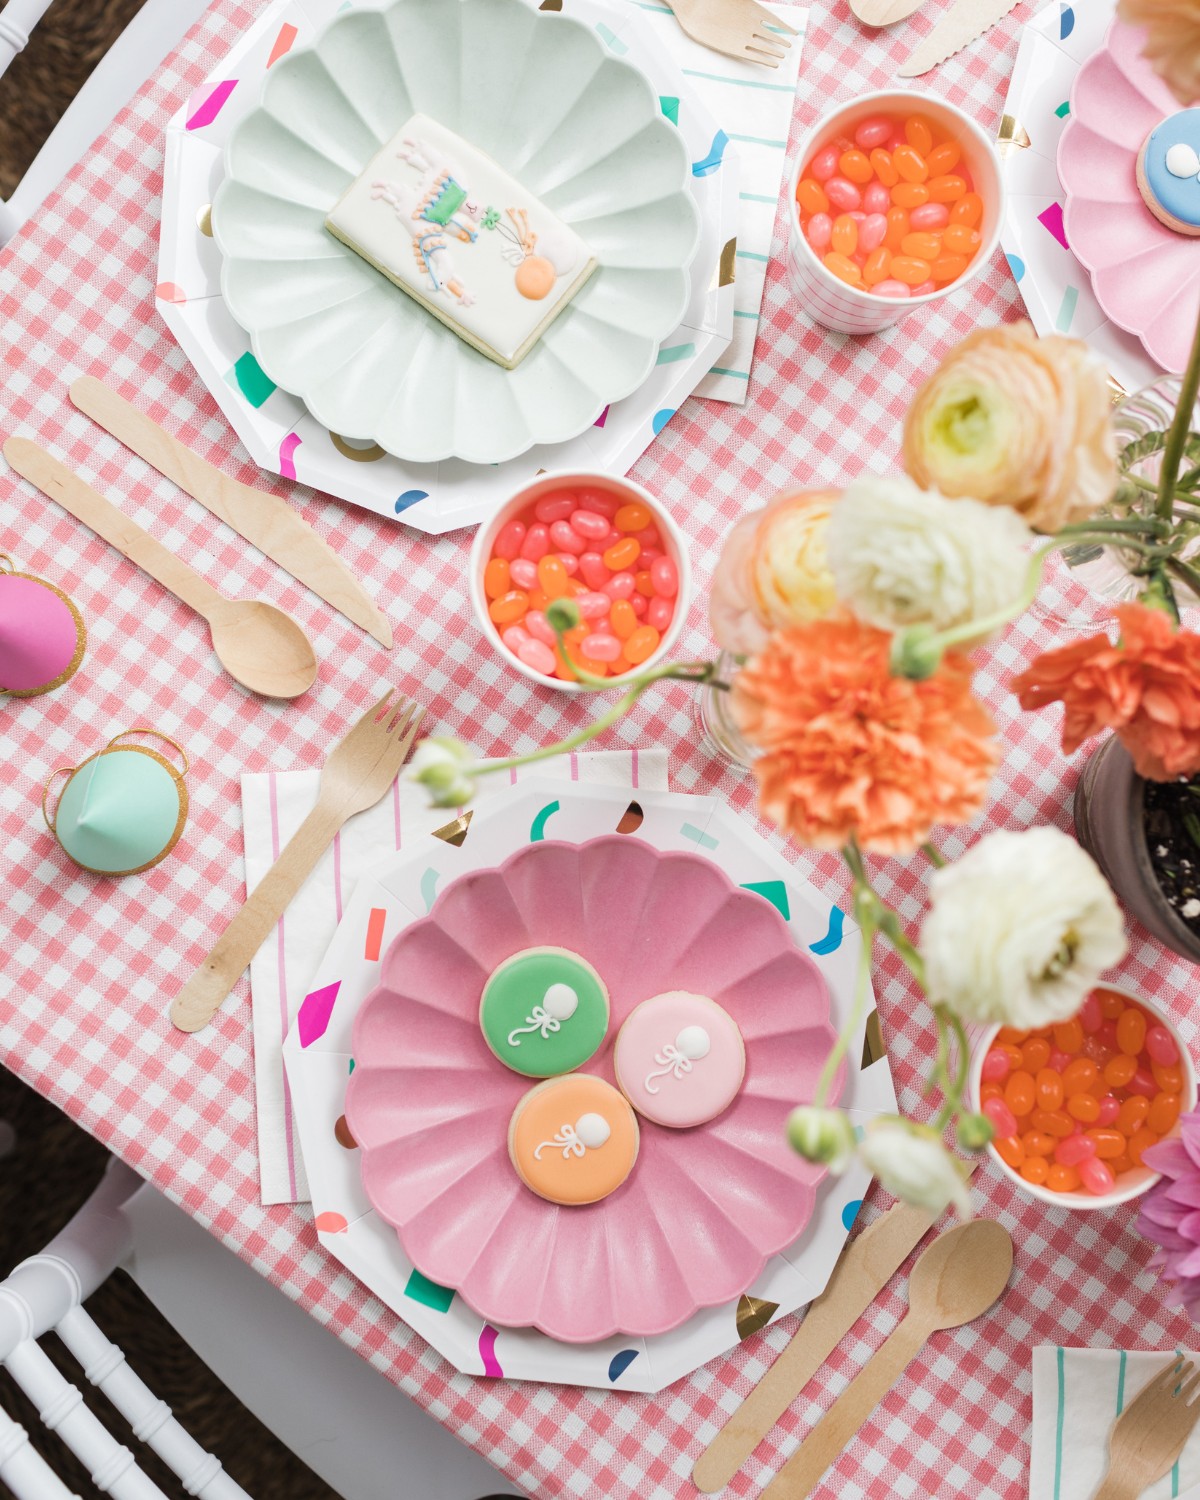
Tabletop Essentials That Always Work
Once your setup is in place, your tabletop details bring everything together. These are the layers that make a party feel thoughtful without being overdone. They also transition easily between different themes and seasons.
- Block print tablecloths in various colors, (blue always working beautifully)
- Plastic tumbler cups
- Bulk Set of Glass bud vases
- Pretty disposable napkins
- Wood cutlery
- Pretty serving tray
- Pretty chip and dip bowl ( another great basic chip and dip bowl here)
- Cutting board for charcuterie
I reach for block print tablecloths constantly because they feel classic but still fresh. Clear vases are another favorite because they work for flowers, greenery, or even candles.
Serving and Beverage Must-Haves
Next, think about how you will serve food and drinks. These pieces help your party flow naturally while keeping everything functional and polished. When these are in place, guests can serve themselves easily, which creates a more relaxed atmosphere.
- Serving utensils
- Beverage dispensers
- Insulated beverage bucket for wine
- Party tub for drinks
- Cornhole lawn game with custom color cornhole bean bags
I especially love using a white cornhole set and pairing it with bags that coordinate with party colors. There is a great variety on Amazon here, which makes it easy to match your theme without much effort.
Lighting and Atmosphere Details
Lighting is one of the simplest ways to completely transform your space. Even a few small additions can make your party feel warm, inviting, and intentional.
Cordless lamps have become a favorite because they add instant ambiance, especially for outdoor or evening gatherings. Paired with votives and tea lights, they create a soft, layered glow that feels effortless.
Custom Party Details Worth Ordering Ahead
Some elements are best planned in advance, and these details often make the biggest impression. Ordering ahead allows you to enjoy the process instead of rushing through it at the last minute.
- Frosted cups
- Personalized napkins
- Balloons
- Food and catering items
- Ice Cream Dishes for an Easy Dessert
- Party signage or menus
These small custom touches bring everything together and make your party feel personal without being overwhelming.
A Few Extra Hosting Essentials to Keep on Hand
There are always a few items you do not think about until you need them. Keeping these on hand helps everything run smoothly and keeps you from having to improvise during the party.
- Extra trash bags
- Ice buckets and scoops
- Bottle opener
- Paper towels and cleaning wipes
- Extension cords for outdoor setups
- Simple trays for passing appetizers
Final Thoughts: Build Your Party Prep Over Time
You do not need to buy everything at once, and honestly, it is better if you do not. Start with a few essentials and add pieces as you host more gatherings. That is exactly how I am building my own collection. Each time I host, I notice one thing I wish I had, and then I slowly add it. Over time, you will create a set of party prep essentials that fit your home and your style. Most importantly, you will spend less time scrambling and more time enjoying your guests, which is really what hosting is all about.


Join the party
Join the Party: Where Milestones Meet Memories! Subscribe to my blog for a dose of party guides, inspiration, and fun!
